
A new Northern Lights season has just begun in the far North.
Every year, as the long Arctic nights return, thousands of travellers head towards Northern Europe hoping to witness one of the most spectacular natural phenomena on our planet. For a landscape and night photographer, however, the Aurora Borealis represents something even more special: the opportunity to combine an extraordinary landscape with one of the most fascinating phenomena in the night sky.
But photographing the Northern Lights is not simply about being in the right place, pointing your camera towards the sky and pressing the shutter button.
A good Aurora Borealis photograph begins long before the lights appear. Choosing the right destination, planning your photography spots, understanding the sky conditions, wearing the right clothing, having the right equipment and being able to adapt quickly to what is happening above you can all make a significant difference to the final result.
In this article, I want to share some of the most important advice I use when preparing my photography trips in the North, focusing not only on how to photograph the Aurora Borealis, but above all on how to prepare for and plan a photography trip dedicated to the Northern Lights.
We will look at the clothing and essential equipment needed to spend several hours outdoors during the cold Arctic nights, how to choose a destination and plan your photography spots, and how to create a composition in which the landscape and the sky work together.
We will also look at some of the most common mistakes that can compromise an aurora photograph and, where useful, I will link to my more detailed guides covering the technical aspects and camera settings.
Because when it comes to the Aurora Borealis, being in the right place at the right time is important. But being prepared when that moment arrives can make all the difference.

What You’ll Learn
- How to Prepare for Northern Lights Photography
- How to Plan a Northern Lights Photography Trip
- 5 Mistakes to Avoid When Photographing the Northern Lights
1. How to Prepare for Northern Lights Photography
Photographing the Aurora Borealis requires much more than a good camera. Before even thinking about camera settings, it is important to be prepared for the conditions in which we will be working.
Nights in the North can be long and cold and, when there is a chance of seeing the aurora, we may have to remain outdoors for several hours, often waiting patiently for the right moment to shoot. Being properly prepared means being able to stay focused on photography without the cold or inadequate equipment becoming a limitation.
There are two fundamental aspects to consider before leaving: how to prepare for the cold and what photographic equipment to bring with you.
1.1 Preparing for the Cold
When travelling north to photograph the Aurora Borealis, the cold is one of the first things to consider.
The high latitudes, the autumn, winter or early spring season and, above all, the long hours spent outdoors at night can create very demanding conditions. During the wait, we also often remain still for long periods, which can make the cold feel even more intense.
For this reason, good clothing is not simply a matter of comfort. It is an essential part of the equipment you need for a photography trip in the Arctic.
The best solution is to dress in layers, so you can easily regulate your temperature depending on the conditions.
As a first layer, merino wool is an excellent choice because it helps retain heat while managing moisture. On top of this, it is advisable to wear a warm insulating layer, while the outer layer should primarily protect you from wind and moisture.
Your hands, feet and head also deserve particular attention. Suitable photography gloves, warm and waterproof winter footwear, and good protection for your head can make a huge difference when spending several hours outdoors.
In general, your clothing system should include:
- First layer: merino wool or thermal material.
- Middle layer: a warm and insulating garment.
- Outer layer: a windproof and, if possible, waterproof jacket or shell.
- Hands: warm gloves that still allow you to operate the camera.
- Feet: two pairs of socks, the first tighter-fitting and made of merino wool, the second thicker and padded, combined with a pair of well-insulated winter boots.
- Head: a good hat or another form of protection from the cold.
The goal is simple: to be prepared to wait for the aurora without the cold forcing us back inside just when conditions are becoming perfect.
During the dozens of photography tours I have led in the Arctic North, I have seen this happen countless times. Just when the aurora starts moving and becoming more intense, some participants can no longer concentrate on photography — or simply enjoy what is happening in front of them — because they are too cold, especially in their hands and feet. Sometimes they are even forced to return to the van to warm up. And that is a real shame, because the moment you have been waiting for hours might last only a few minutes.
Being properly prepared for the cold is therefore not just about staying comfortable. It means being ready to make the most of those unforgettable moments when the aurora finally appears.

1.2 Preparing Your Photography Equipment
Once you are prepared to deal with the environmental conditions, it is time to think about your equipment.
The Aurora Borealis can be extremely dynamic. At times, it may move slowly and appear as a faint arc on the horizon, while during an auroral outburst it can move rapidly across the sky and change shape within seconds.
At the same time, we are almost always working in very low-light conditions. Having the right equipment can therefore make a significant difference.
In general, for this type of photography, it is important to have:
- A camera with good high-ISO performance.
- A very bright wide-angle lens, preferably a prime lens, such as a 14mm or 16mm f/1.8.
- A stable tripod, which is essential when working with longer exposure times and creating an effective photographic composition.
A camera with good high-ISO performance is certainly an advantage, but one of the most important pieces of equipment is the lens.
For photographing the aurora, I generally recommend a very bright wide-angle lens, preferably a prime lens. A 14mm or 16mm with an f/1.8 aperture is ideal.
When the aurora is moving quickly, being able to use a very wide aperture allows us to collect more light and keep the exposure time short enough to preserve its structure and movement.
For this reason, especially when dealing with a fast-moving aurora, I would avoid using lenses that are not bright enough. An aperture narrower than f/2.8 can make it much more difficult to achieve a correct exposure without having to increase the ISO even further or lengthen the exposure time.
Finally, a stable tripod is essential. When working in low light and often using relatively long exposure times, a tripod not only helps prevent camera shake but also allows us to create a strong photographic composition.
Choosing the right equipment, however, is only one part of the process. The correct settings depend on the intensity and speed of the aurora, as well as the specific conditions of the scene.
For this reason, I have prepared a dedicated guide covering
2. How to Plan a Northern Lights Photography Trip
Once you are prepared for the cold and have the right equipment in your bag, we come to perhaps the most important part of a photography trip dedicated to the Aurora Borealis: planning.
The Aurora can be forecast to a certain extent, and we can often predict when activity is likely to increase and which part of the sky is most likely to be active. What we cannot predict with the same precision is exactly how it will develop within our composition. Its shape, movement and position can change rapidly, making it difficult to know exactly how it will interact with the foreground and landscape we have chosen.
We can, however, do a great deal to increase our chances of being in the right place when the sky begins to light up. By choosing the right destination, planning our shooting locations and preparing alternative compositions, we can be ready to react when the activity starts to develop.
A successful trip is therefore not simply about reaching an area where the lights are visible. It is about finding locations that also offer interesting landscapes, foregrounds, mountains, coastlines, lakes and other elements capable of making the photograph more complete and personal.
2.1 Choosing the Right Destination
When planning a photography trip to photograph the Aurora Borealis, the first question should not simply be, “Where can I see the aurora?” but rather:
“Where can I photograph the aurora in an extraordinary landscape?”
From a photographic point of view, there is a huge difference between an image composed almost entirely of sky and one in which the Aurora Borealis becomes an integral part of the landscape.
Photographing the Northern Lights is not simply about pointing the camera upwards and capturing a portion of green sky. The aim is to create a balanced and compelling composition in which the landscape and the lights work together.
A simple way to think about the composition is to divide the scene into three elements:
- Foreground: the foreground gives depth to the image and leads the viewer’s eye into the photograph.
- Background: the landscape, mountains, fjords, snow-covered trees, coastlines or any other element that helps tell the story of the place.
- Sky: the Aurora Borealis becomes the main element in the sky and completes the composition.
The key is to find a position from which these three elements interact visually.
A mountain surrounded by the Northern Lights, a reflection on the water, a beach in the foreground or a small illuminated house can completely transform an aurora photograph. These are the elements that allow us to tell not only the story of the phenomenon, but also of the place where we experienced it.
For this reason, when choosing a destination, I do not consider only the probability of seeing the Aurora Borealis. A photography trip should offer interesting landscapes and a wide variety of compositional possibilities, allowing us to continue creating strong images even when auroral activity is not particularly intense.
Among the Northern European destinations that offer some of the best opportunities to combine the Aurora Borealis with landscape photography are certainly Northern Norway, including places such as the Lofoten Islands and Senja, Iceland and Finnish Lapland.
Each of these destinations has very different characteristics and offers its own photographic possibilities: from the mountains rising directly from the sea in Lofoten, to the vast volcanic landscapes and coastlines of Iceland, and the forests, frozen lakes and snow-covered landscapes of Finnish Lapland.
The right destination, therefore, is not necessarily the one where the aurora is simply most visible, but the one that offers the best balance between the conditions for seeing it and the opportunity to create a memorable landscape photograph.
There is, however, an important point to make. The probability of seeing the Aurora Borealis does not change that dramatically between these three destinations. The geomagnetic conditions that determine auroral activity affect a very large area of Northern Europe.
The Lofoten Islands, being further north and located under the auroral oval, can offer a small advantage when activity is weak, because weaker auroras can also be visible. Finnish Lapland, on the other hand, generally requires slightly stronger auroral activity to observe the phenomenon, but it has another characteristic that is equally important for a photographer: skies that are often clearer and less cloudy. This can compensate for the need for a stronger aurora, making the overall chances of witnessing the phenomenon fairly similar.
But while the chances of seeing the aurora may be comparable, the landscape in front of your camera can be completely different.
Lofoten
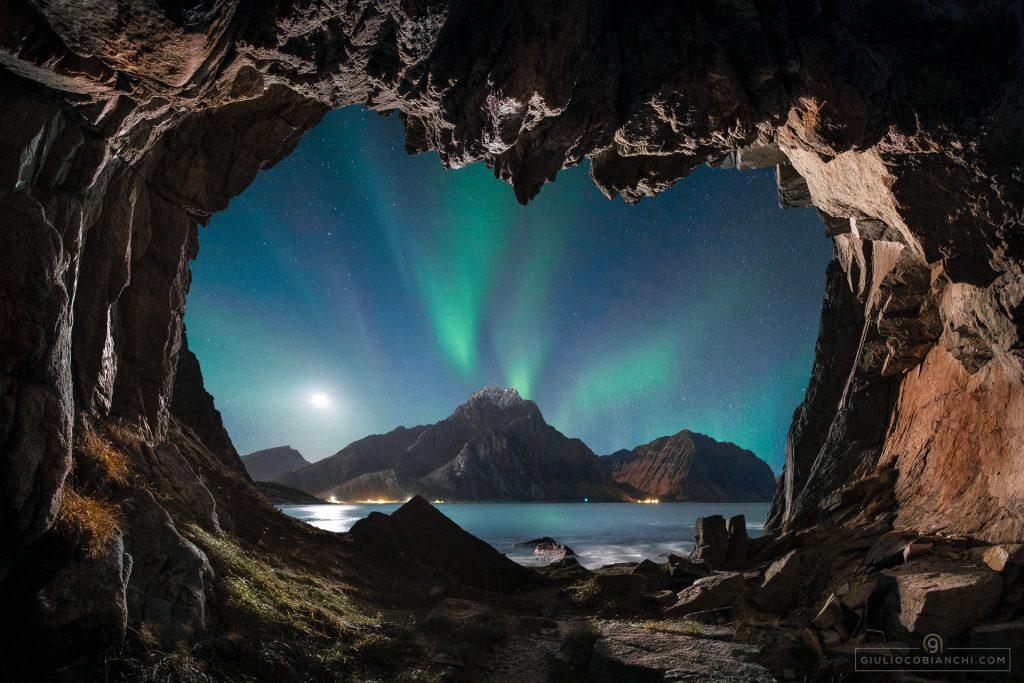
In my opinion, the Lofoten Islands are one of the most spectacular places in the world to photograph the Aurora Borealis.
Here, snow-covered and frozen mountains rise directly from the sea, creating spectacular fjords where snow meets the ocean. It is precisely this combination of mountains, water, snow and small fishing villages that makes Lofoten a true paradise for landscape photography.
The many compositional possibilities, often just a few minutes’ drive from one another, make it possible to create powerful and dramatic images, bringing together the strength of the Arctic landscape and the dance of the Aurora Borealis across the sky.
Iceland
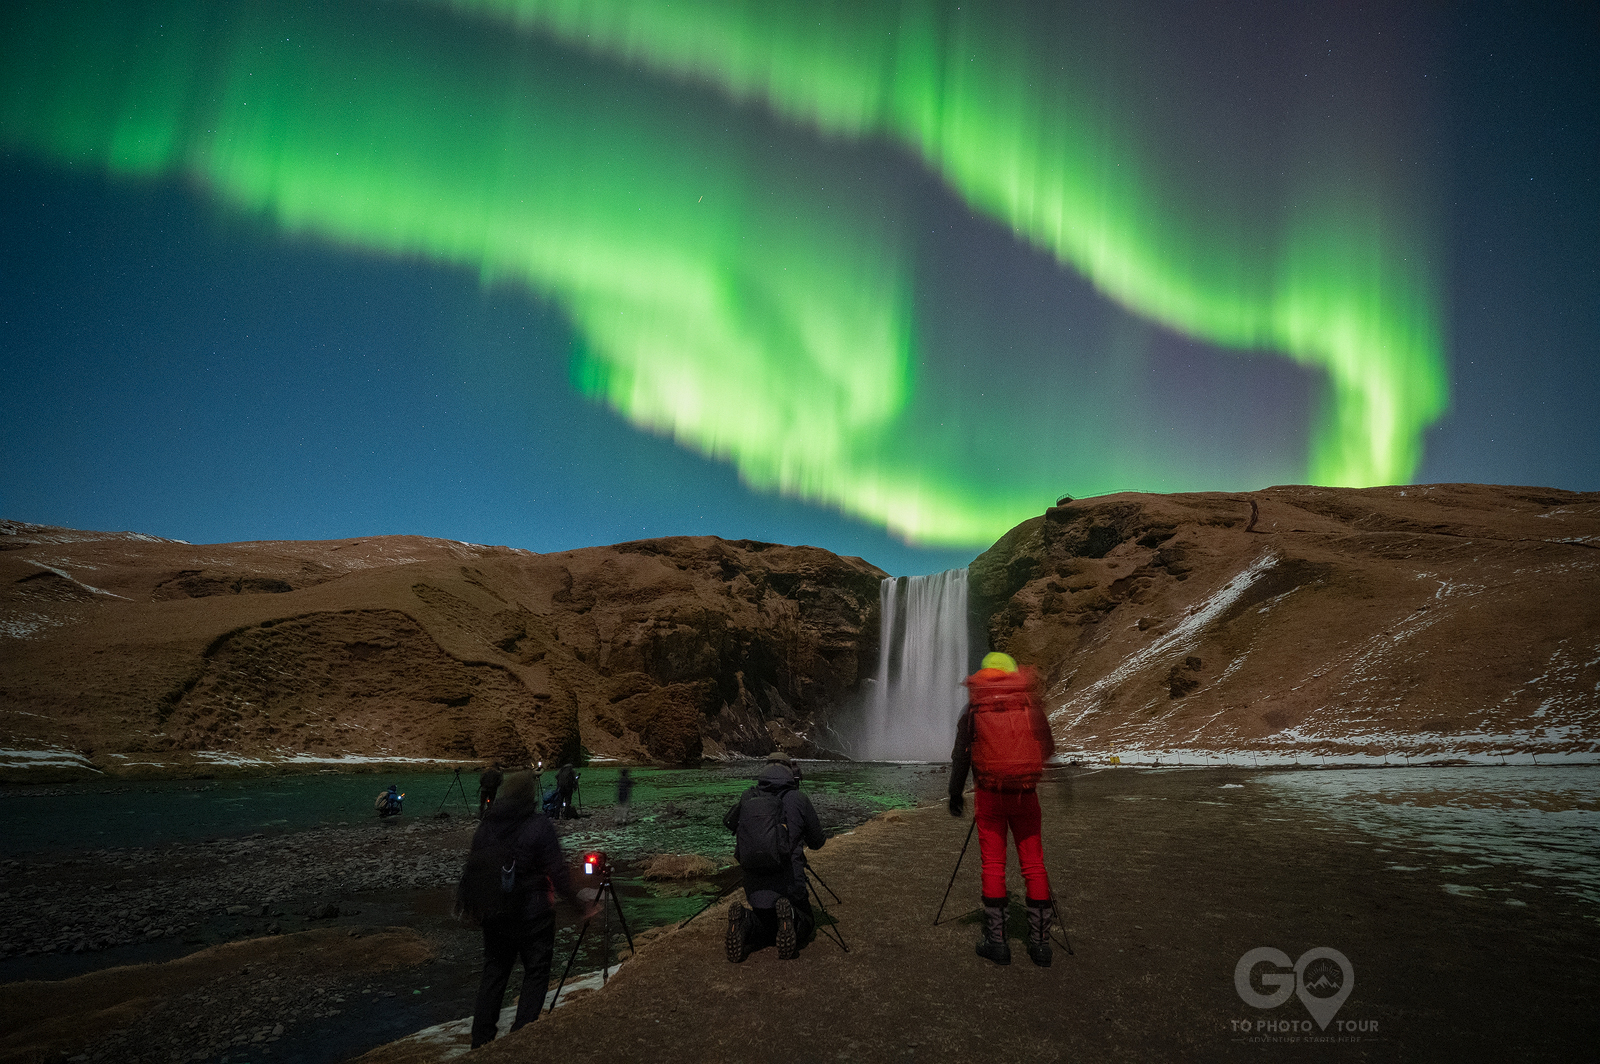
Iceland is one of the wildest and most spectacular lands I have ever seen. The vastness of its volcanic landscapes creates scenes that are completely different from those found in other Arctic destinations.
Here, you can photograph the Aurora Borealis above enormous waterfalls, volcanic cliffs, imposing lava sea stacks and wild coastlines shaped by the ocean. The incredible variety of the Icelandic landscape offers endless possibilities for creating compositions in which the power of the natural environment combines with that of the aurora.

Finnish Lapland
Finnish Lapland is a true winter wonderland, where winter seems to express everything that makes it so special.
Here, the landscape is dominated by immense forests and spruce trees completely covered in snow, which can be transformed into real white giants. It is fantastic to play with these shapes and their three-dimensionality, creating atmospheric compositions among snowy forests, starry skies and the Northern Lights.
It is probably one of the best places to experience and photograph what I like to call green nights: long, silent winter nights completely immersed in snow, illuminated only by the stars and the Aurora Borealis.

Want to experience these landscapes for yourself and photograph the Aurora Borealis with us? Discover our Northern Lights Photo Tours in Lofoten, Iceland and Finnish Lapland.
2.2 Choosing the Right Time of Year
Once you have chosen your destination, the next question is when to go.
At the high latitudes of Northern Europe, the Aurora Borealis season coincides with the time of year when the nights become dark enough again. Roughly speaking, from late August and early September through to late March and early April, there are sufficient periods of darkness to observe and photograph the Northern Lights.
During the summer months, however, daylight gradually takes over the night sky. At Arctic latitudes, twilight and residual daylight can last for many hours, making it impossible to observe the aurora even when geomagnetic activity is favourable.
This does not mean, however, that there is one single best month for seeing the Aurora Borealis. The phenomenon depends mainly on solar activity and geomagnetic conditions, which cannot be scheduled months in advance.
Statistically, the darkest months — November, December, January and February — simply provide a longer window in which to look for the aurora. There are many more hours of darkness during which the phenomenon can be observed and photographed. This does not mean that it will necessarily be more intense or more frequent during these months.
From a photographic point of view, however, there are two periods that I find particularly interesting: autumn and winter.
Autumn: Colours and Aurora Borealis
The Arctic autumn arrives much earlier than it does at more southern latitudes and, already between late August and September, the landscape can change completely.
It is one of the most fascinating times to photograph the Aurora Borealis because it allows us to combine the intense colours of autumn vegetation with the Northern Lights. Reds, oranges and yellows can become part of the foreground and landscape, creating a spectacular contrast with the green aurora in the sky.
It is a particularly interesting season for anyone who wants to create aurora photographs that are different from the classic winter images. The landscape is still free of snow, but the North has already taken on the deep colours of autumn.
Winter: The Arctic Landscape
With the arrival of winter, the same landscape completely changes its appearance.
The colours of autumn give way to the white of snow and ice, and the Arctic landscape reveals its full character. Completely snow-covered trees, frozen lakes, snow-covered coastlines, ice formations and, in some destinations, icebergs become new elements with which to build the composition.
Photographing the Aurora Borealis in winter therefore means working with a completely frozen landscape, where the white of snow and ice can create a spectacular contrast with the green, purple and red tones of the aurora.
Ultimately, the choice between autumn and winter depends mainly on the type of photography you want to create: on one side, the intense colours of autumn and the Aurora Borealis; on the other, the completely frozen Arctic landscape and the Northern Lights.
Once you have chosen the time of year, however, there is another fundamental question: where should you photograph the aurora? Not all locations are the same, and the exact position from which you shoot can completely determine the final composition.
2.3 Planning Your Photography Spots
Once you have chosen your destination and the time of year, another fundamental step is to decide where to photograph the Aurora Borealis.
Finding a dark location where the aurora is visible is relatively easy. Finding the right spot for creating a landscape photograph requires a little more planning.
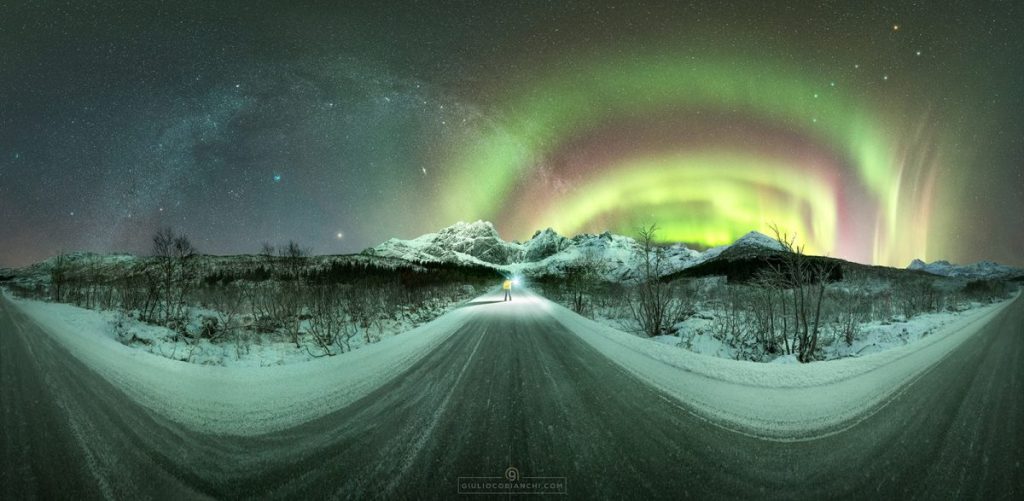
When I prepare a photography trip in the North, one of the first things I look for is a spot away from cities, villages and sources of light pollution, preferably with a wide view towards the north. When auroral activity is weak, the aurora often tends to remain low on the northern horizon before increasing in intensity and developing further across the sky. Having a completely open view to the north, without high mountains or other obstacles in front of you, therefore increases the chances of seeing even weaker auroras and, more importantly, of incorporating them into the composition.
At this point, I try to build the photograph starting with the foreground.
An interesting foreground can make a huge difference. It could be a frozen puddle, cracks in the ice, a particular snow formation or what we photographers often call “ice eggs” or “dragon eggs”. These are formations that can occur when sea ice is pushed and broken against rocks, creating rounded and very unusual accumulations.
The idea is to find a foreground element that adds depth and leads the eye towards the landscape and the sky. The background could be a mountain, a village or another characteristic element of the landscape, while above it we leave enough space for the Aurora Borealis.
For each spot, I therefore look at several fundamental elements:
Accessibility: considering how easy and safe the spot is to reach, especially during winter, when snow, ice and road conditions can change rapidly.
The landscape: mountains, coastlines, lakes, forests, rivers or other characteristic elements that can become part of the photograph.
The foreground: an element close to the camera that adds depth and leads the viewer’s eye towards the landscape and the sky.
The shooting direction: understanding how the landscape is arranged in relation to the possible directions in which the aurora may appear.
Light pollution: whenever possible, choosing locations away from major sources of artificial light in order to preserve the visibility of weaker auroras.

For this reason, during my GoToPhotoTour photography tours, I always try to take participants out to see and study the locations during the day. Together, we explore the area, identify possible compositions and study how the landscape could be photographed at night.
This allows us to understand directly in the field where to position ourselves, which foreground to use and which shooting direction will work best. I also explain how the aurora can normally begin developing in a particular direction and why that specific spot may be particularly interesting as the starting point for our session.
When night arrives, we already know where to go and which composition to look for. It is important to arrive at the location in good time and wait for the aurora rather than trying to reach the spot when the Northern Lights have already exploded across the sky.
That will therefore be our first position of the evening. From there, we will observe how the aurora evolves and, if necessary, move towards other spots we have already identified during the daytime reconnaissance.
The Aurora Borealis is not completely predictable. We can have a good idea of when activity is likely to increase and which part of the sky may become active, but we cannot know exactly how it will develop within our composition. If it begins developing in a different direction, we can change our position, adjust the angle of the camera or move to another spot we have already studied.
When you do not know the destination well and it is not possible to carry out a daytime reconnaissance, technology can be a great help. Google Earth allows you to explore the area virtually and understand the shape of the landscape, while apps such as PhotoPills allow you to plan the position of the Sun and Moon and the shooting directions with greater precision.
Using these two resources together makes it possible to plan a composition very accurately, almost as if you had already carried out a field reconnaissance.
Planning, however, should never become too rigid. Having a main spot, a few alternatives and a good knowledge of the area simply allows us to make decisions more quickly when the moment arrives.
Because we can plan the perfect composition, but in the end, it will always be the sky that decides what the photograph will look like.

3. 5 Mistakes to Avoid When Photographing the Northern Lights
Even with good preparation and careful planning, there are some very common mistakes that can compromise an Aurora Borealis photograph.
Throughout my experience leading photography tours dedicated to the Northern Lights, I have seen the same mistakes repeated many times, often precisely when the aurora was at its most spectacular.
They are simple mistakes to avoid, but knowing about them can make a significant difference to the final result.
Here are the 5 most common mistakes when photographing the Aurora Borealis:
1.Using a lens that is too long and not bright enough
2.Being afraid to raise the ISO
3.Using autofocus
4.Using a shutter speed that is too slow
5.Using the wrong white balance
If you want to explore each of these mistakes in more detail and understand how to avoid them and which solutions work best in the field, take a look at this article:
Conclusion
Photographing the Aurora Borealis is an experience that goes far beyond photography itself.
It means spending a night in the silence of the Arctic, waiting for the sky to slowly begin lighting up. It means standing in front of mountains, fjords, snow-covered forests or wild coastlines while the Northern Lights dance above us.
But above all, it means being ready to turn those moments into photographs that will last forever.
That is precisely the purpose of my Northern Lights Photo Tours: not simply to take you north to see the Aurora Borealis, but to guide you step by step in creating a real photography portfolio dedicated to the Northern Lights.
Throughout the trip, we will guide you in choosing photography spots, composing your images, managing the light and adapting to different conditions, helping you make the right decisions directly in the field. Whether you are an experienced photographer or simply want to improve your photography, the GoToPhotoTour team will be by your side step by step, from the first night to the final shot.
The goal is to return home not only with the memory of having experienced the magical Arctic nights, but with a collection of images that you can genuinely be satisfied and proud of.
If you would also like to experience this adventure and discover some of the most spectacular places in Europe for photographing the Aurora Borealis, I invite you to take a look at my Northern Lights Photo Tours.
The magical Arctic nights are waiting for you!

